>>
30-MINUTE MEALS! Get the email series now →


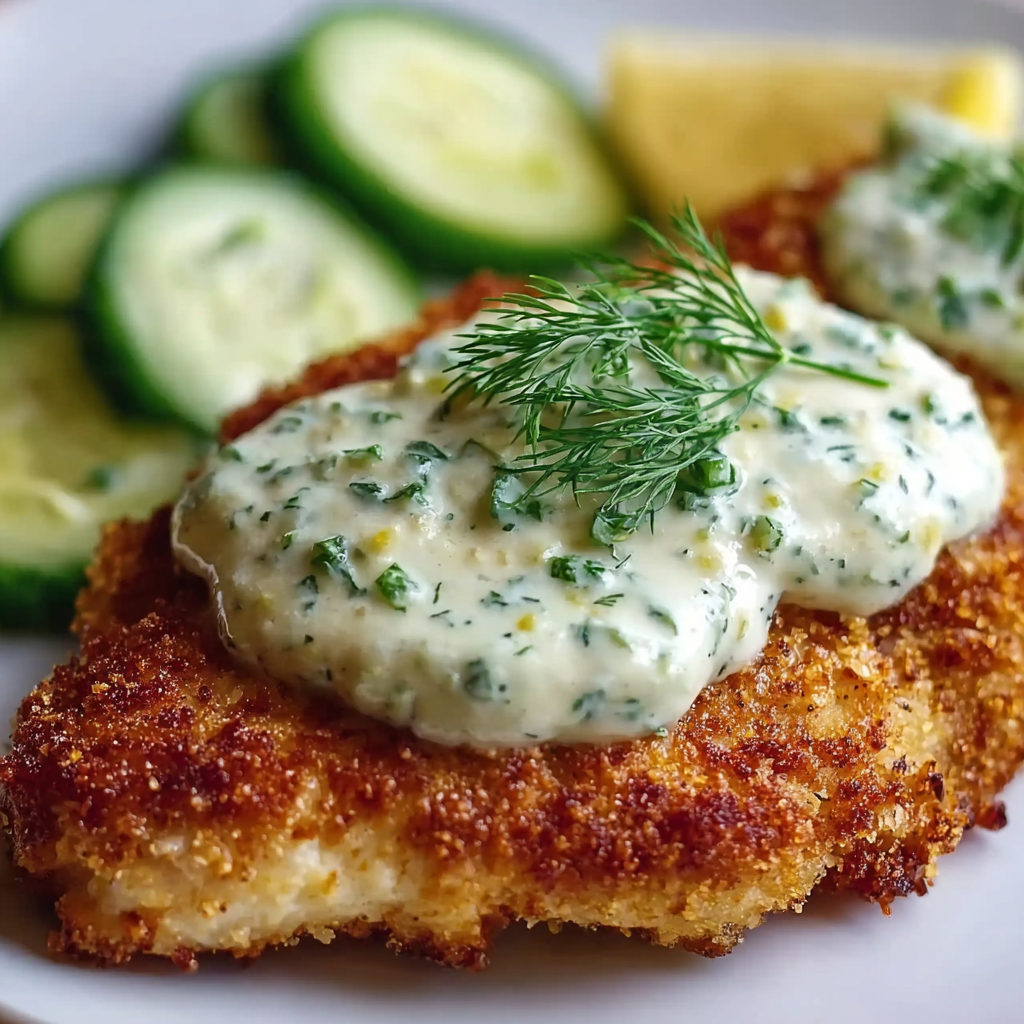
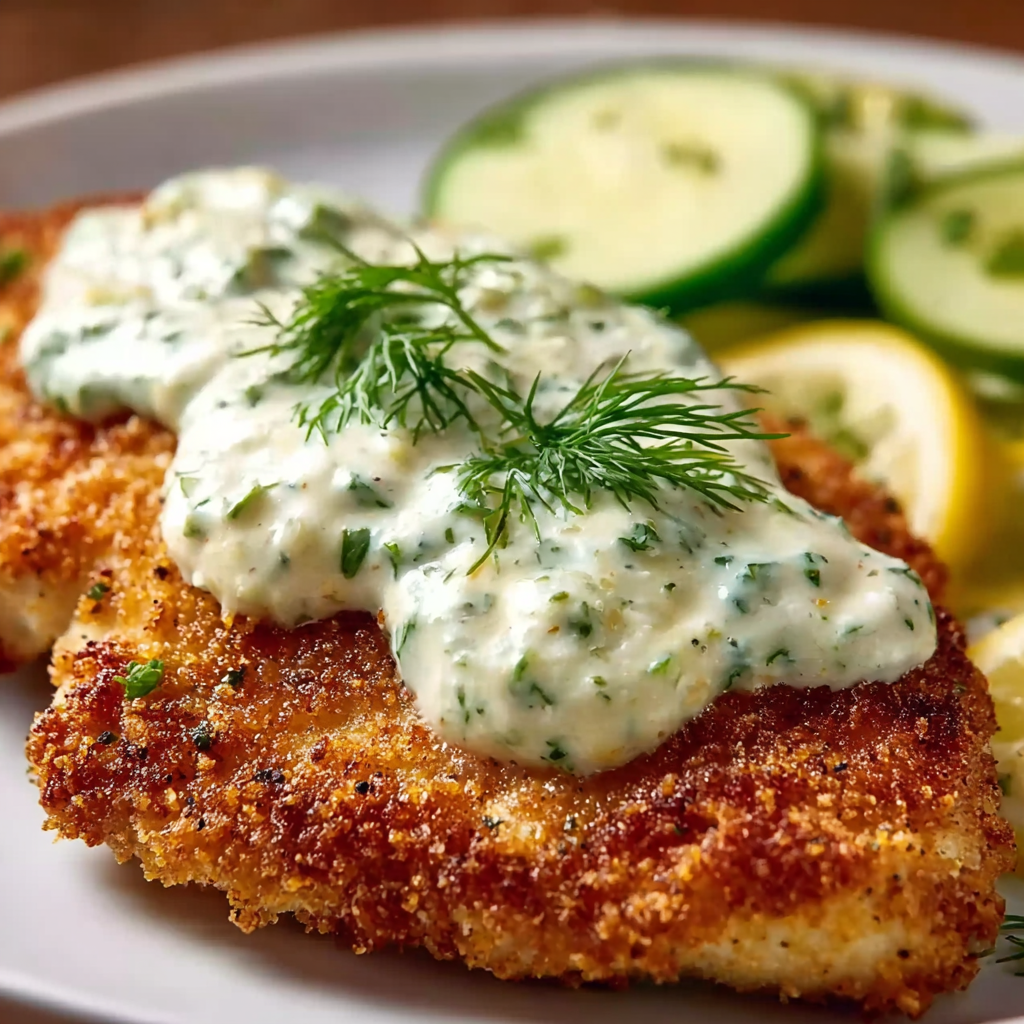
Crispy, tangy, and cheesy chicken breasts brined in dill pickle juice then coated with Parmesan and breadcrumbs for an irresistible weeknight favorite.

This recipe is my go-to when I want something that tastes indulgent without a ton of fuss: tender chicken breasts soaked briefly in dill pickle juice, then coated in a Parmesan-breadcrumb crust and fried until golden and crisp. I first developed it on a rainy Saturday when the pantry looked bleak but the fridge held a jar of crunchy dill pickles. The brine transformed the chicken—bright, savory, and with a whisper of tang—while the Parmesan adds a nutty, salty finish that keeps everyone coming back for more. The contrast of the crisp exterior with the juicy interior is what makes this dish a repeat request at my table.
I discovered how forgiving this method is after a few practice runs. Marinating time can be short—30 minutes when you are pressed for time, or up to two hours for deeper flavor. The technique is simple enough for beginners but yields a result that feels restaurant-worthy: a crunchy, golden crust flecked with grated Parmesan and seasoned crumbs, and chicken that reaches a safe 165°F internal temperature while remaining moist. Serve it with a simple green salad or potato wedges and you have a meal that feels nostalgic and new at the same time.
When I first served this, my partner declared it the best “comfort-meets-crazy” dinner. My sister asked for the recipe and used it for a weeknight potluck; the tray was empty before the salad was touched. The tang of pickle juice surprises people in a delightful way, and the Parmesan keeps it balanced and savory. Over time I learned small tweaks—patting the chicken fully dry, pressing the crumb mixture firmly—that made the crust reliably crisp every time.
My favorite part is the way the pickle brine brightens every bite without making the chicken overtly “pickley.” It’s a balance of tang, salt, and crunchy, cheesy crust that plays well with simple sides. The method is forgiving—if a spot loses crumbs during frying, press a few extra into the warm crust after flipping; they’ll adhere. Friends often tell me this tastes like a grown-up chicken tender, and kids agree.
Store cooled pieces in an airtight container lined with paper towels to absorb excess moisture; this helps maintain surface texture. Refrigerate for up to 3 days. To re-crisp, place on a wire rack over a sheet pan and heat in a 375°F oven for 8 to 12 minutes, flipping once. For freezing, flash-cool on a tray, wrap each piece tightly in foil, then place in a freezer bag for up to 3 months. Thaw overnight in the refrigerator before reheating to avoid soggy crusts.
If you don’t have breadcrumbs, use 1 cup crushed potato chips, crackers, or 3/4 cup panko for extra crunch. Swap Parmesan for Pecorino Romano for a sharper, saltier bite; reduce added salt slightly. To make gluten-free, use 1/2 cup gluten-free flour and gluten-free breadcrumbs. For lower oil cooking, bake at 425°F on a wire rack for 20 to 25 minutes, flipping once—brush lightly with oil to mimic frying.
Serve alongside a crisp green salad, roasted potatoes, or coleslaw to balance richness. It’s fantastic sliced and layered into a sandwich with lettuce and dill mayo, or chopped into a grain bowl with quinoa, roasted vegetables, and a drizzle of ranch. Garnish with lemon wedges, chopped parsley, or extra grated Parmesan. For parties, slice thin and offer with dipping sauces like honey mustard, ranch, or spicy aioli.
Brining with pickle juice is a playful nod to traditional brining techniques used worldwide to both season and tenderize meat. Pickle-brined chicken has grown in popularity in casual American cooking—an inventive fusion of classic brine science and comfort-food cravings. The Parmesan crust nods to Italian-American flavors, combining crispy, golden textures with the savory character of aged cheese. Together it feels familiar while offering a modern twist on comfort cooking.
In spring and summer, lighten the plate with a herb salad and grilled vegetables; add chopped fresh dill or sliced radishes for brightness. In colder months, pair with warm mashed potatoes and roasted root vegetables; fold a pinch of smoked paprika into the breadcrumb mix for depth. For holiday gatherings, serve sliced on a platter with pickled vegetables and grain salads for a varied spread.
For weeknight meal prep, brine chicken in the morning and store in the fridge until evening—coat and fry right before serving to keep the crust crisp. Alternatively, fry a batch, cool completely, and portion into containers for lunches; reheat in the oven. Prepare your dredging stations on a tray so assembly is efficient, and label leftovers with date; they keep well for three days refrigerated.
Final thoughts: this combination of tangy brine and cheesy crunch has earned a permanent place in my dinner rotation. It’s fast, flexible, and thoroughly delicious—try it once and you’ll understand why it’s a repeat request at my house.
Pat chicken very dry after removing from the brine to ensure the coating crisps properly.
Press the breadcrumb-Parmesan mixture firmly onto the egg-coated chicken to form a sturdy crust that won’t fall off during frying.
Use an instant-read thermometer and aim for 165°F at the thickest part to ensure safe, juicy results.
Avoid overcrowding the pan; fry in batches so oil temperature remains steady for even browning.
If short on time, 30 minutes of brining adds a noticeable lift in flavor and tenderness.
This nourishing crispy dill pickle parmesan chicken recipe is sure to be a staple in your kitchen. Enjoy every moist, high protein slice — it is perfect for breakfast or as a wholesome snack any time.
Yes. The safe target internal temperature for chicken breast is 165°F measured at the thickest part using an instant-read thermometer.
Refrigerate cooked pieces in an airtight container for up to 3 days. Reheat in a 375°F oven on a wire rack to maintain crispness.
This Crispy Dill Pickle Parmesan Chicken recipe makes perfectly juicy, tender, and flavorful steak every time! Serve with potatoes and a side salad for an unforgettable dinner in under 30 minutes.
Place chicken breasts in a shallow dish or zip-top bag and pour 1 cup dill pickle juice over them. Ensure all pieces are coated and refrigerate for 30 minutes to 2 hours.
Arrange three shallow dishes: seasoned flour, whisked eggs, and breadcrumb-Parmesan mixture. This sequence (flour, egg, crumbs) ensures a stable coating.
Remove chicken from brine and pat completely dry. Dredge in flour, dip into egg wash, then press into the breadcrumb-Parmesan mixture until well coated.
Heat oil to about 350°F in a large skillet to a depth of 1/2 inch. Fry chicken 5–7 minutes per side, adjusting heat to avoid burning, until internal temp reaches 165°F.
Move cooked breasts to a wire rack to drain excess oil and rest 3–5 minutes before serving to allow juices to redistribute.
Last Step: Please leave a rating and comment letting us know how you liked this recipe! This helps our business to thrive and continue providing free, high-quality recipes for you.
Leave a comment & rating below or tag
@highrecipe on social media!
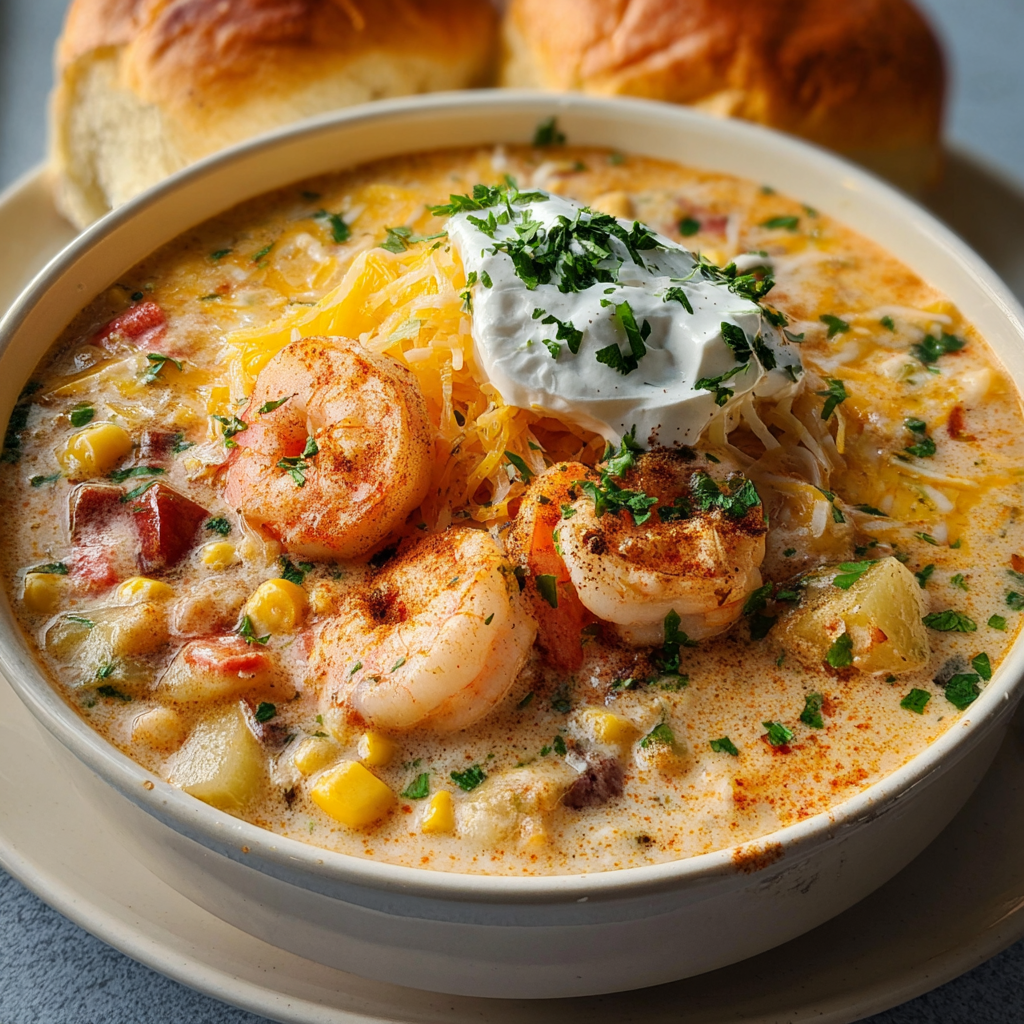
A comforting, creamy chili loaded with shrimp, lump crab, and lobster, balanced by beans, spicy tomatoes, and melty cheese for weeknight luxury.
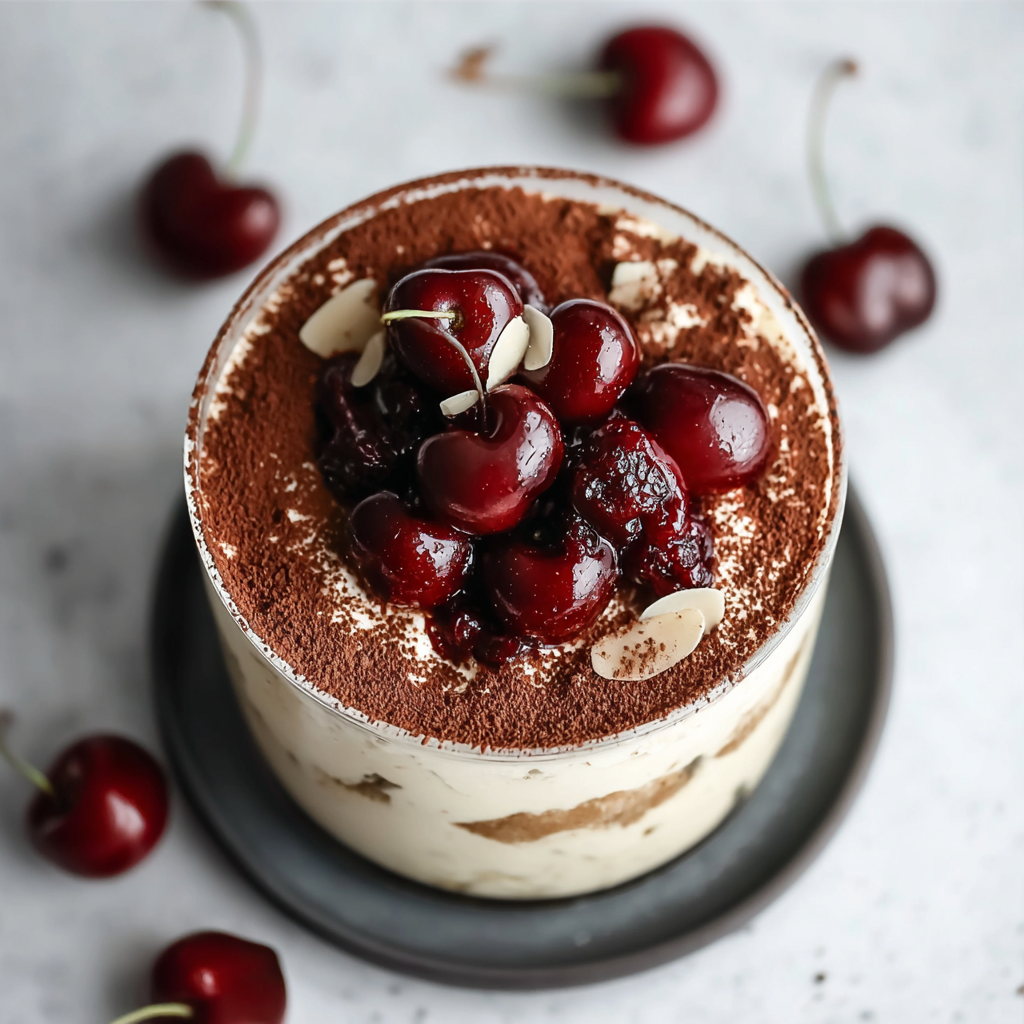
A luscious twist on the classic dessert combining mascarpone, fresh cherries and amaretto for a fragrant and elegant chilled treat.
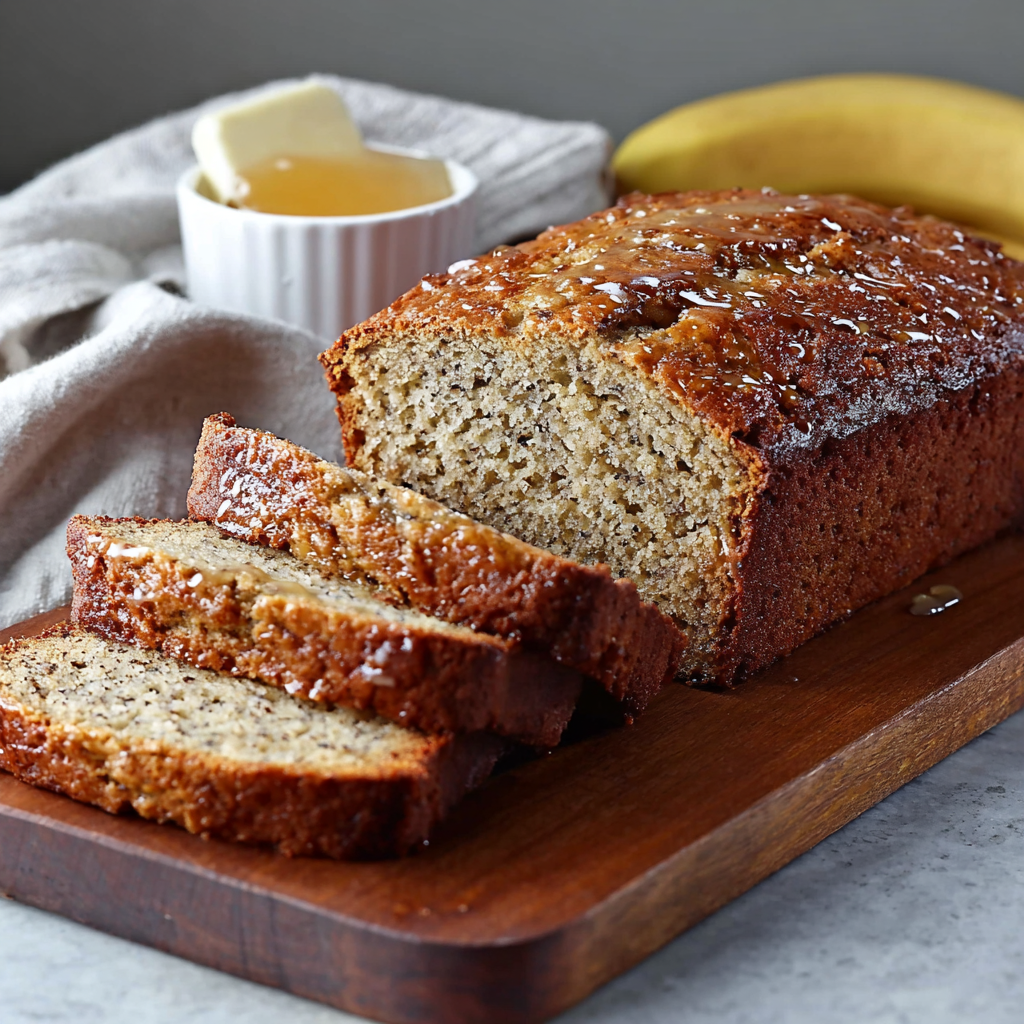
A tender, ultra-moist loaf made with ripe bananas, melted butter, and a simple mix-and-bake method—perfect for breakfast, snack, or dessert.
Leave a comment & rating below or tag @highrecipe on social media!
Enjoyed this recipe? Share it with friends and family, and don't forget to leave a review!
This recipe looks amazing! Can't wait to try it.
Comments are stored locally in your browser. Server comments are displayed alongside your local comments.

Join to receive our email series which contains a round-up of some of our quick and easy family favorite recipes.