
Heart-Shaped Red Velvet Whoopie Pies

Tender red velvet cakes piped into little hearts and sandwiched with a pillowy cream cheese filling—perfect for celebrations, gifts, and cozy afternoons.
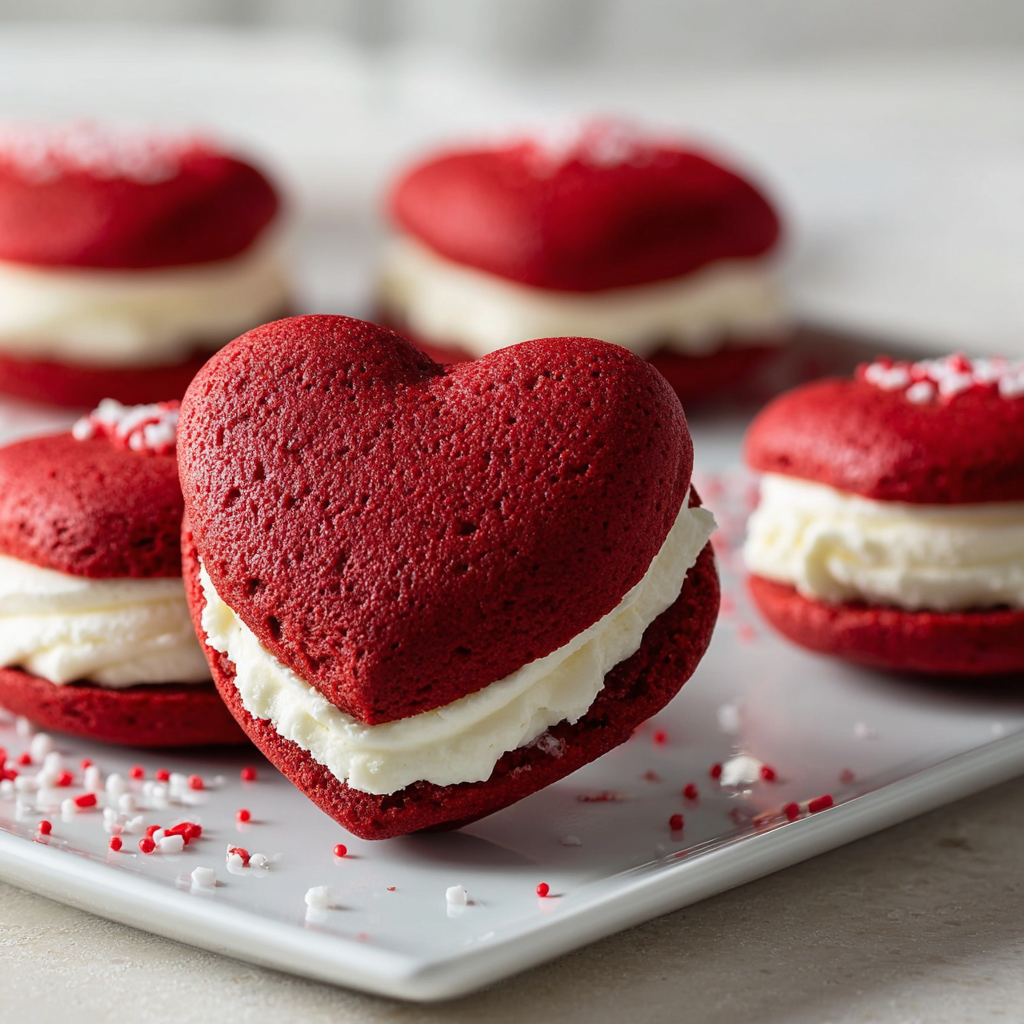
This recipe for heart-shaped red velvet whoopie pies has been a Valentine staple in my kitchen for years. I discovered the idea when I wanted a charming, handheld treat that felt special without the fuss of a layered cake. The first time I piped those small red hearts onto a sheet, my toddler clapped and insisted on helping with the filling—an instant family favorite. The texture is what keeps us coming back: the cakes are tender and slightly cakey with a delicate crumb, while the cream cheese filling is tangy, smooth, and just sweet enough to balance the cocoa notes.
I love making these when the house needs a pick-me-up: they travel well to potlucks, double as a thoughtful gift when boxed up, and can be scaled for a crowd. The combination of cocoa, buttermilk, and a splash of vinegar gives the red velvet its classic depth without being overly rich. Baking them as hearts is more about intent than perfect piping—those charming imperfections are part of the joy. Over the years I've learned a few tricks—temperature of ingredients, piping technique, and the right amount of filling—that make assembly easy and consistent.
Why You'll Love This Recipe
- Handheld and portable: easy to take to gatherings and simple to package for gifts—each sandwich is a tidy, individual portion.
- Quick to bake: individual cakes take just 10–12 minutes in the oven, so you can have fresh sandwiches in under an hour with prep.
- Uses pantry staples: flour, sugar, cocoa, butter, eggs, and buttermilk with a splash of vinegar—nothing exotic required.
- Make-ahead friendly: cakes and filling refrigerate well and assemble the next day for stress-free entertaining.
- Kid-approved: fun piping shapes make this a great activity with children while teaching basic baking skills and measuring.
- Customizable: swap the filling, adjust sweetness, or color for holidays and seasonal events.
My family always reacts like these were an event. Once, I made a batch for a school bake sale and they sold out within an hour—people commented on the tender crumb and the balanced filling that wasn’t too sweet. Baking them shaped like hearts turned a simple treat into a keepsake many asked for again and again.
Ingredients
- All-purpose flour (2 cups): Use a reliable brand such as King Arthur or Gold Medal. Spoon into the cup and level with a knife for accurate measurement—this prevents a dry, dense cake.
- Granulated sugar (1 cup): Regular white sugar provides sweetness and structure; you can reduce up to 2 tablespoons if you prefer a slightly less sweet profile.
- Buttermilk (1 cup, room temperature): The acidity gives tenderness and reacts with baking soda for lift. If you don't have cultured buttermilk, mix 1 tbsp lemon juice or vinegar with milk and rest 10 minutes.
- Baking soda (1 tsp): Provides rise—make sure it is fresh for best results.
- Unsweetened cocoa powder (1 tbsp): Use natural cocoa (not Dutch-processed) for the bright red velvet contrast. Brands like Ghirardelli or Hershey's work well.
- Vanilla extract (1 tsp): Pure vanilla adds aroma; avoid imitation for best flavor.
- Red food coloring (1 tsp): A gel or paste color (such as AmeriColor) gives vivid red without adding liquid—good-quality color is essential for a deep hue.
- Apple cider vinegar (1 tbsp): Reacts with baking soda to help lift and gives a slight tang that balances cocoa.
- Unsalted butter (1/2 cup, softened): For the cakes: room-temperature butter creams with sugar to incorporate air. For the filling you will use an additional 1/2 cup.
- Large egg (1, room temperature): Adds structure and moisture; bring to room temp to emulsify evenly.
- Cream cheese (1 cup, full-fat, softened): For the filling: full-fat yields the best texture and flavor. Philadelphia brand is a classic choice.
- Powdered sugar (3 cups): Sift if lumpy; adds structure and sweetness to the filling and helps it stand up between the cakes.
Instructions
Prepare the oven and dry ingredients: Preheat the oven to 350°F (175°C). Line two baking sheets with parchment. In a medium bowl whisk together the 2 cups flour, 1 tsp baking soda, 1 tbsp cocoa powder, and 1/4 tsp salt until evenly combined; set aside so the leaveners are distributed. Cream butter and sugar: In a large bowl, beat 1/2 cup softened butter with 1 cup granulated sugar using a hand mixer or stand mixer on medium-high until light and fluffy, about 3 minutes. Scrape the bowl to ensure even creaming—this incorporates air which helps tenderize the cakes. Add wet ingredients: Beat in the egg until combined. Add 1 cup room-temperature buttermilk, 1 tbsp apple cider vinegar, 1 tsp vanilla extract, and 1 tsp red food coloring. Mix on low just until uniform—overmixing will develop gluten and toughen the crumb. Combine dry and wet: Fold the dry ingredients into the wet mixture in two additions, mixing gently until just combined. The batter should be slightly thick but pipeable. If too runny, add a tablespoon of flour; if too stiff, add a teaspoon of buttermilk. Pipe heart shapes: Transfer batter to a piping bag fitted with a round or slightly angled tip (a zip-top bag with a corner snipped will do). Pipe small heart shapes about 2 inches across onto the prepared sheets, leaving 1.5 inches between each. To form a heart, pipe a teardrop shape and pull down to a point—practice on parchment if needed. Bake: Bake at 350°F for 10–12 minutes until the tops spring back when pressed lightly and a toothpick comes out with a few moist crumbs. Avoid overbaking; these should remain tender. Cool on the sheet for 5 minutes, then transfer to a rack to cool completely before filling. Make the filling: In a bowl, beat 1 cup softened full-fat cream cheese with 1/2 cup softened unsalted butter until smooth. Gradually add 3 cups powdered sugar and 1 tsp vanilla, beating until light, fluffy, and pipeable—about 2–3 minutes. Scrape down the bowl for an even texture. Assemble: Flip half the cakes so the flat sides face up. Pipe a generous dollop of filling onto each, then top with a matching heart, pressing gently to spread the filling to the edges. Chill assembled sandwiches 15–20 minutes to set the filling for neater presentation.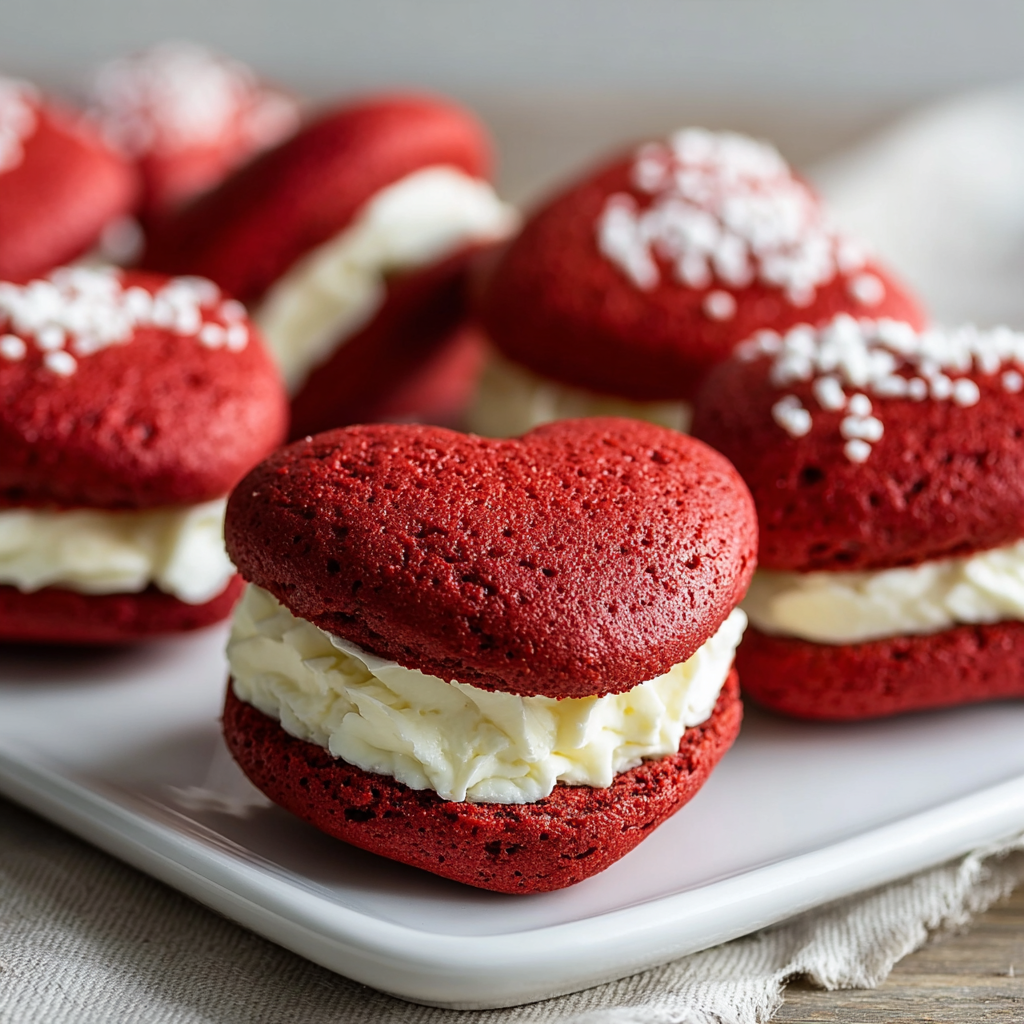
You Must Know
- These hold well refrigerated for up to 3 days; you can freeze unfrosted cakes for 1 month and thaw before assembly.
- High in calcium and fat from the cream cheese and butter—portion control helps keep them an occasional treat.
- Use room-temperature ingredients for smoother batter and filling; cold butter or egg will slow emulsification and create lumps.
- If you have food coloring sensitivity, reduce color or use natural beet powder for a softer pink hue.
My favorite thing about these is how they remind me of small celebrations—birthdays, school events, or an evening when we need something bright. People tell me the texture is unusual in the best way: more tender than a cookie, but sturdier than a cupcake, and that contrast with the tangy filling is the real draw.

Storage Tips
For short-term storage, place sandwiches in an airtight container and refrigerate up to 3 days—this keeps the filling stable and preserves texture. If you want to freeze, separate layers with parchment to avoid sticking and freeze cakes (unfilled) in a single layer in a zip-top bag for up to 1 month. Thaw overnight in the refrigerator before bringing to room temperature and assembling. To revive slightly stale cakes, warm in a 275°F oven for 5 minutes wrapped in foil, then cool before filling.
Ingredient Substitutions
Want to adjust? Swap whole-milk buttermilk with 1 cup milk plus 1 tbsp vinegar if needed. For a lighter filling, use half the butter and sub in 1/4 cup mascarpone for creaminess. If avoiding dairy, try a stabilized vegan cream cheese and a non-dairy butter substitute—note texture and flavor will differ. For a less intense red, reduce the coloring or use natural beet powder at a 1:1 replacement by volume; expect an earthier flavor with beets.
Serving Suggestions
Present these on a tiered stand for a tea party or package in small boxes with a ribbon for gifts. They pair beautifully with black coffee, milky hot chocolate, or a glass of milk. Garnish with a dusting of powdered sugar, a small piped rosette, or a drizzle of melted dark chocolate for an elegant finish. For a party, alternate plain and filled centers for visual variety.
Cultural Background
Whoopie pies have roots in New England and Pennsylvania Dutch traditions—small cakes sandwiched around a sweet filling that evolved from simple cake-and-cream combinations. The red velvet variation blends that American classic with the Southern red velvet profile—cocoa, buttermilk, and vinegar—which rose to popularity in the 20th century. This fusion celebrates regional baking techniques: the tender crumb of Southern baking with the nostalgic, portable format of the whoopie pie.
Seasonal Adaptations
Change colors and flavors to match seasons: a peppermint-spiked filling and emerald green hearts for winter, orange and cinnamon for fall, or pastel colors for spring. In summer, use a lemon-cream filling or add fresh berries between layers for brightness. For holiday parties, pipe smaller hearts and top each with a tiny edible gold dust spot.
Meal Prep Tips
Make the cakes a day ahead and store airtight in the refrigerator. Prepare the filling the morning of assembly and pipe just before serving to keep edges neat. For large batches, bake in multiple sheets and let cool completely before stacking to avoid residual steam. Pack assembled sandwiches in single layers for transport with parchment between layers to prevent sticking.
These little heart-shaped sandwiches are more than dessert—they're a way to mark moments with something homemade and thoughtful. Whether you bake them for a crowd or a quiet family night, they’re simple enough to make repeatedly and special enough to be remembered.
Pro Tips
Bring butter, egg, and cream cheese to room temperature for smoother batter and filling.
Pipe practice hearts on spare parchment to perfect shape before filling baking sheets.
Use gel food coloring for vivid color without thinning the batter.
Chill assembled sandwiches briefly to set the filling for cleaner edges.
This nourishing heart-shaped red velvet whoopie pies recipe is sure to be a staple in your kitchen. Enjoy every moist, high protein slice — it is perfect for breakfast or as a wholesome snack any time.
FAQs about Recipes
Can I freeze the cakes ahead of time?
Yes. Bake the cakes fully, cool, then freeze unfrosted layers up to 1 month. Thaw in the refrigerator before filling and assembling.
How do I fix a runny or stiff filling?
If the filling is too loose, chill it 15–30 minutes to firm up before piping. If too stiff, beat in 1 tsp milk at a time.
Tags
Heart-Shaped Red Velvet Whoopie Pies
This Heart-Shaped Red Velvet Whoopie Pies recipe makes perfectly juicy, tender, and flavorful steak every time! Serve with potatoes and a side salad for an unforgettable dinner in under 30 minutes.
Ingredients
Whoopie Pie Cakes
Cream Cheese Filling
Instructions
Preheat and combine dry ingredients
Preheat oven to 350°F (175°C). Line baking sheets with parchment. Whisk together flour, baking soda, cocoa, and salt in a medium bowl and set aside.
Cream butter and sugar
Beat softened butter and granulated sugar until light and fluffy, about 3 minutes. Scrape the bowl to ensure even mixing for proper aeration.
Mix wet ingredients
Beat in the egg, then add buttermilk, vinegar, vanilla, and red food coloring. Mix on low until combined—avoid overmixing to keep the crumb tender.
Fold in dry ingredients
Add dry mixture in two parts, folding gently until just combined. The batter should be thick but pipeable; adjust with teaspoons of buttermilk or flour if needed.
Pipe hearts and bake
Pipe 2-inch heart shapes onto prepared sheets, leaving space between. Bake 10–12 minutes until tops spring back. Cool on racks before filling.
Prepare filling and assemble
Beat cream cheese and butter, then gradually add powdered sugar and vanilla until fluffy. Pipe onto flat side of one cake and sandwich with a match—chill to set.
Last Step: Please leave a rating and comment letting us know how you liked this recipe! This helps our business to thrive and continue providing free, high-quality recipes for you.
Nutrition
Did You Make This?
Leave a comment & rating below or tag
@highrecipe on social media!
Categories:
You might also like...

Easy Creamy Seafood and Shrimp Chili
A comforting, creamy chili loaded with shrimp, lump crab, and lobster, balanced by beans, spicy tomatoes, and melty cheese for weeknight luxury.
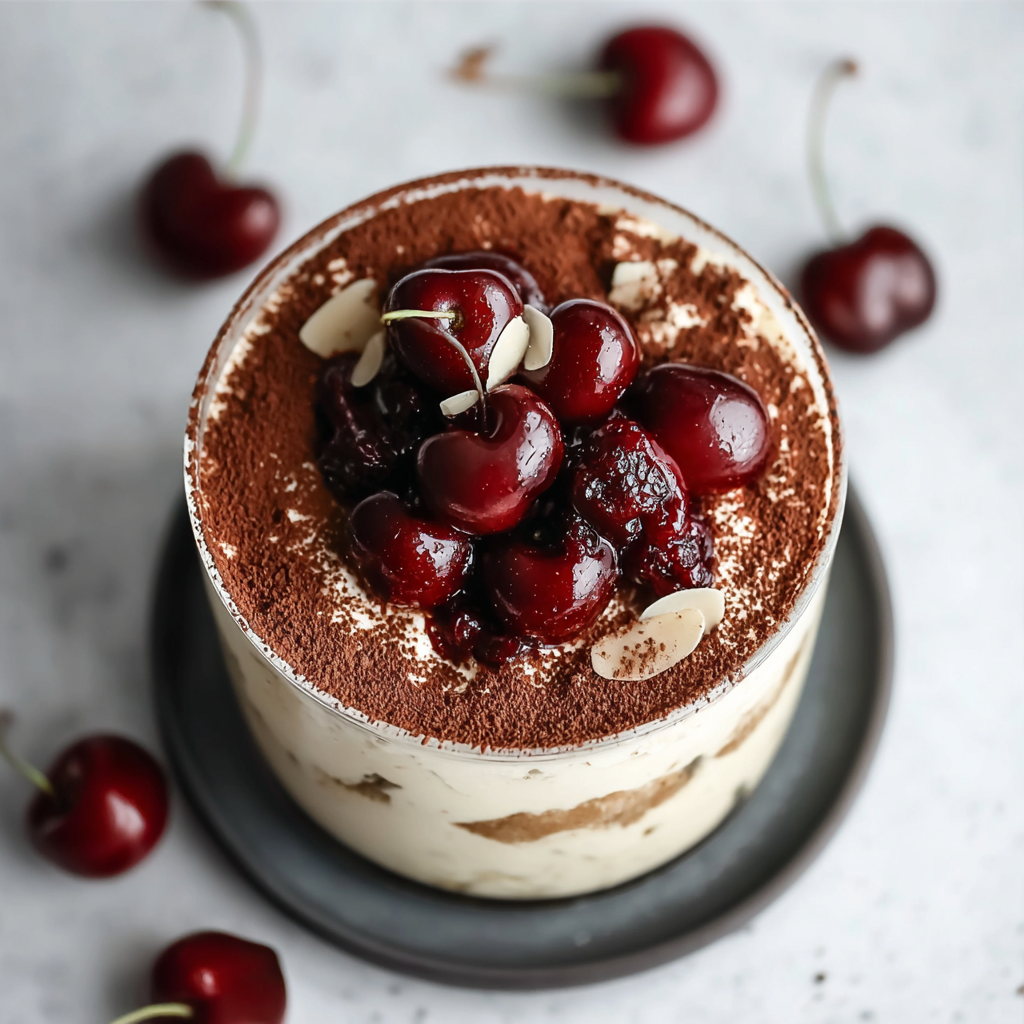
Cherry Amaretto Tiramisu
A luscious twist on the classic dessert combining mascarpone, fresh cherries and amaretto for a fragrant and elegant chilled treat.
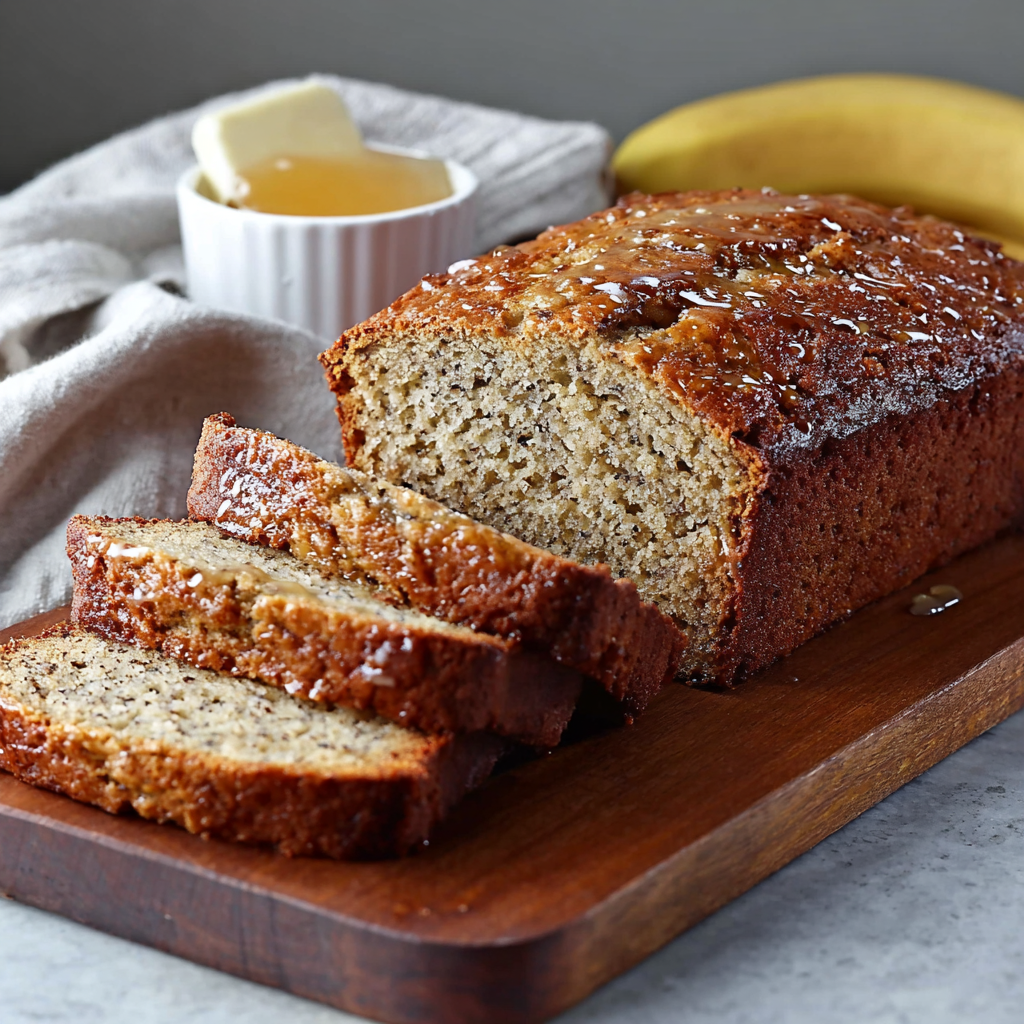
Moist Banana Bread That Melts in Your Mouth
A tender, ultra-moist loaf made with ripe bananas, melted butter, and a simple mix-and-bake method—perfect for breakfast, snack, or dessert.
Did You Make This?
Leave a comment & rating below or tag @highrecipe on social media!
Rate This Recipe
Share This Recipe
Enjoyed this recipe? Share it with friends and family, and don't forget to leave a review!
Comments (1)
This recipe looks amazing! Can't wait to try it.
Comments are stored locally in your browser. Server comments are displayed alongside your local comments.

Hi, I'm Anna!
What's Popular
30-Minute Meals!
Join to receive our email series which contains a round-up of some of our quick and easy family favorite recipes.