>>
30-MINUTE MEALS! Get the email series now →


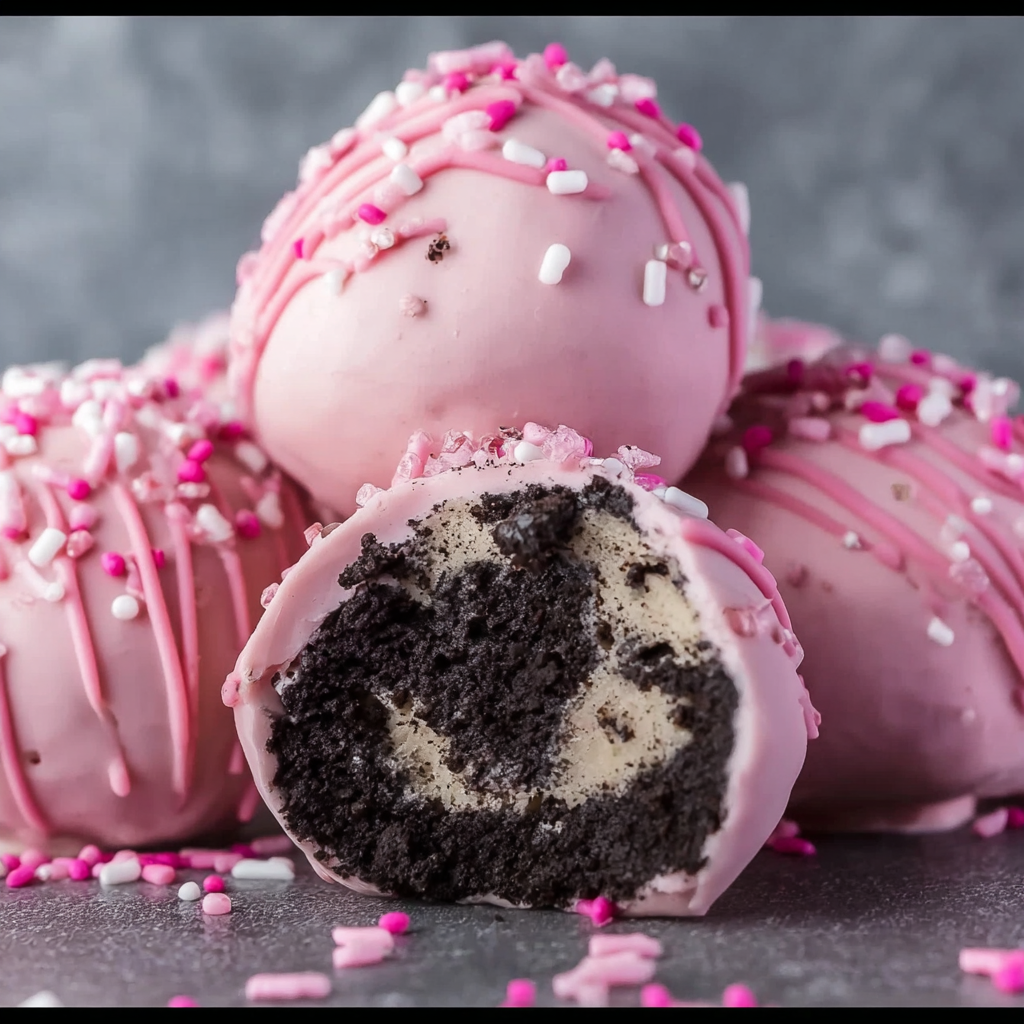
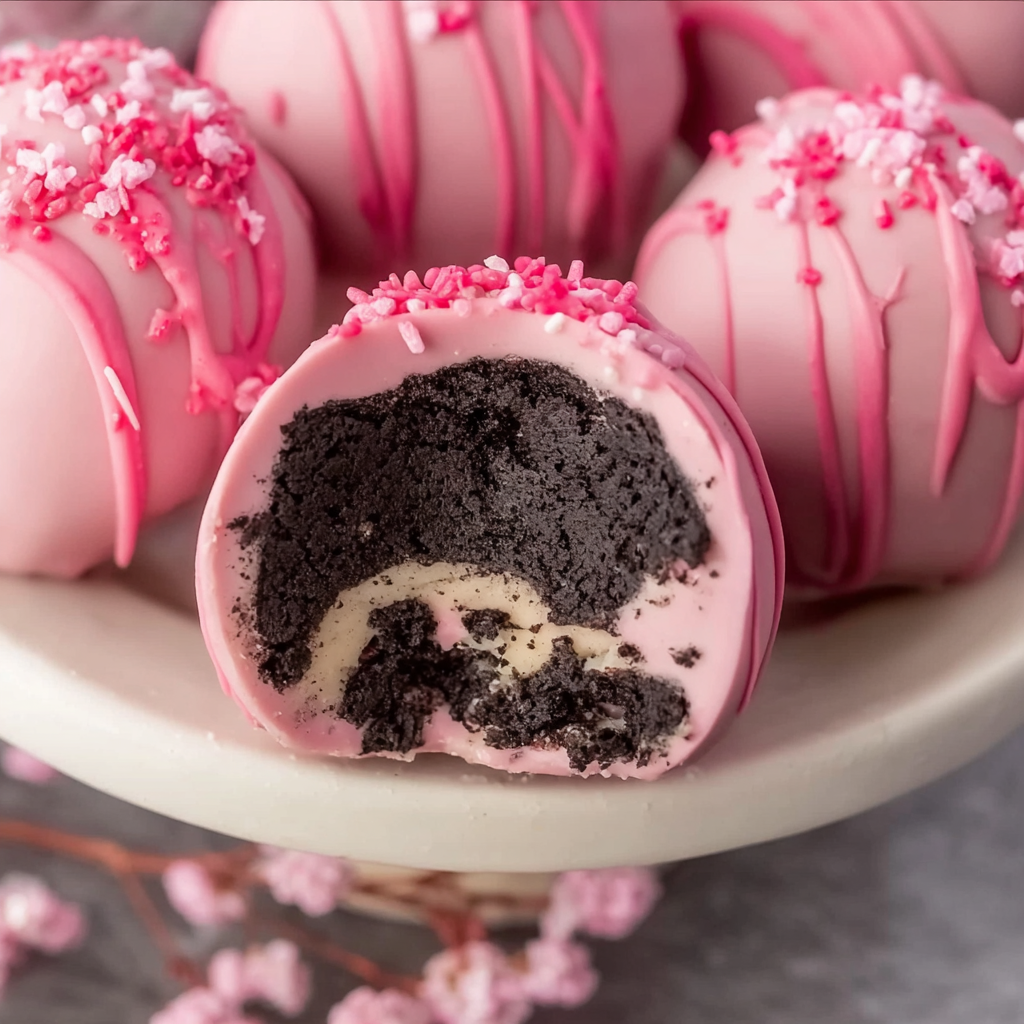
Decadent Oreo truffle balls dipped in a glossy pink candy coating—easy to make, perfect for parties, and irresistibly festive.

This batch of Oreo truffle balls with a pink candy coating has been a go-to for celebrations in my kitchen for years. I first discovered this combination during a Valentine's Day bake-a-thon when I wanted a no-bake treat that looked elegant but stayed simple to prepare. The moment the first glossy pink truffle hit my tongue, I knew it was a keeper: the contrast of crunchy cookie crumbs transformed into a silky, slightly tangy center, wrapped in a sweet candy shell. Every holiday since, these have been the treat I reach for when I need something that looks special without hours of fuss.
What makes these especially memorable is the texture interplay: the finely processed Oreo crumbs give a gentle grain that melds with cream cheese into a luxuriously smooth filling, and the candy coating snaps softly before melting and releasing chocolate-and-sugar notes. I still remember bringing a tray to a neighborhood potluck and watching them disappear in under ten minutes. If you want a recipe that feels like a bakery offering but requires only pantry staples and basic tools, these are the answer.
My family always asks me to double the batch now. The first time I made them for a baby shower, neighbors returned plates the following day asking for the recipe. It's the kind of simple sweet that becomes a memory-maker.
My favorite thing about these is how easy they are to transport and gift. I once packed them in cupcake liners in a small box for a neighbor who had surgery, and they brightened her day more than any store-bought sweets. They also travel well to potlucks because the candy shell protects the soft center.
Store finished truffle balls in a single layer in an airtight container with parchment between layers to prevent sticking. Keep refrigerated for up to two weeks. For longer storage, freeze in a rigid container for up to three months; allow them to thaw in the refrigerator overnight before serving. If you need to keep them at room temperature for an event, place them in a cool shaded area and avoid direct sun; the candy shell will hold up for several hours in moderate temperatures but avoid leaving them out in heat above 75°F.
If you can't find candy melts, use white chocolate chips with 1 teaspoon of vegetable oil to achieve a similar coating; do not use water-based colorings with white chocolate as they cause seizing. Swap cream cheese for mascarpone for a richer, silkier center but reduce added sugar. For a gluten-free version, use gluten-free sandwich cookies and check that your sprinkles and candy melts are certified gluten-free.
Present them in mini cupcake liners on a platter garnished with edible flowers or extra sprinkles. These pair well with coffee, tea, or a glass of sparkling wine for a celebratory touch. For a themed party, alternate colors of candy coating and use matching sprinkles. They are also lovely packaged in small bakery boxes as edible favors.
Swap coating colors and sprinkles for different holidays—pastel melts for Easter, green and red for Christmas, orange and black for Halloween. Add a drop of peppermint extract to the filling in winter for a candy-cane flair or a hint of orange extract in spring. You can also roll the raw balls in cocoa powder, toasted coconut, or chopped nuts before freezing for different textures under the shell.
Make the filling up to three days ahead and keep refrigerated; shape and freeze balls on a tray, then transfer to a bag for space-saving storage. When ready to serve, dip frozen balls straight from the freezer to the warm candy coating—this keeps the centers firm and speeds up the process. Use a small cookie scoop to portion evenly and save time shaping.
I once taught a neighborhood cookie swap workshop where participants made these in under an hour and left with several boxes each. One attendee told me they used them as a topping for ice cream sundaes at a birthday party, which was an instant hit. These have also become my go-to for small gifts because they convey effort and care while being simple to produce in batches.
These truffle balls are more than a sweet—they are a versatile, reliable treat that suits celebrations and casual comforts alike. Make them your own by experimenting with flavors and colors, and enjoy the way they bring people together.
Chill the truffle centers on a tray before dipping to prevent them from collapsing under the warm coating.
Use a cookie scoop for uniform sizes to ensure even setting and a professional look.
If the candy coating thickens, reheat in short 10-second bursts and stir until smooth.
Work in small batches so the coating stays warm and fluid; keep extra melts warm on very low heat if dipping a large number.
This nourishing oreo truffle balls with pink candy coating recipe is sure to be a staple in your kitchen. Enjoy every moist, high protein slice — it is perfect for breakfast or as a wholesome snack any time.
This Oreo Truffle Balls with Pink Candy Coating recipe makes perfectly juicy, tender, and flavorful steak every time! Serve with potatoes and a side salad for an unforgettable dinner in under 30 minutes.
Pulse the cookies in a food processor to fine crumbs or crush in a sealed bag with a rolling pin. Mix crumbs with softened cream cheese and optional powdered sugar until cohesive and slightly sticky. Chill briefly if too soft.
Use a cookie scoop or hands to form 1-inch balls, place on parchment-lined baking sheet and freeze for 20 to 30 minutes until firm.
Combine candy melts with oil in a microwave-safe bowl and heat in 30-second intervals, stirring until smooth and warm but not hot. Keep warm for dipping.
Dip frozen truffles into melted coating using a dipping fork, tap off excess, return to parchment, and add sprinkles while coating is wet. Repeat for all truffles.
Refrigerate the tray for 10 to 15 minutes until the coating is firm. Store in an airtight container in the fridge for up to two weeks or freeze for longer storage.
Last Step: Please leave a rating and comment letting us know how you liked this recipe! This helps our business to thrive and continue providing free, high-quality recipes for you.
Leave a comment & rating below or tag
@highrecipe on social media!
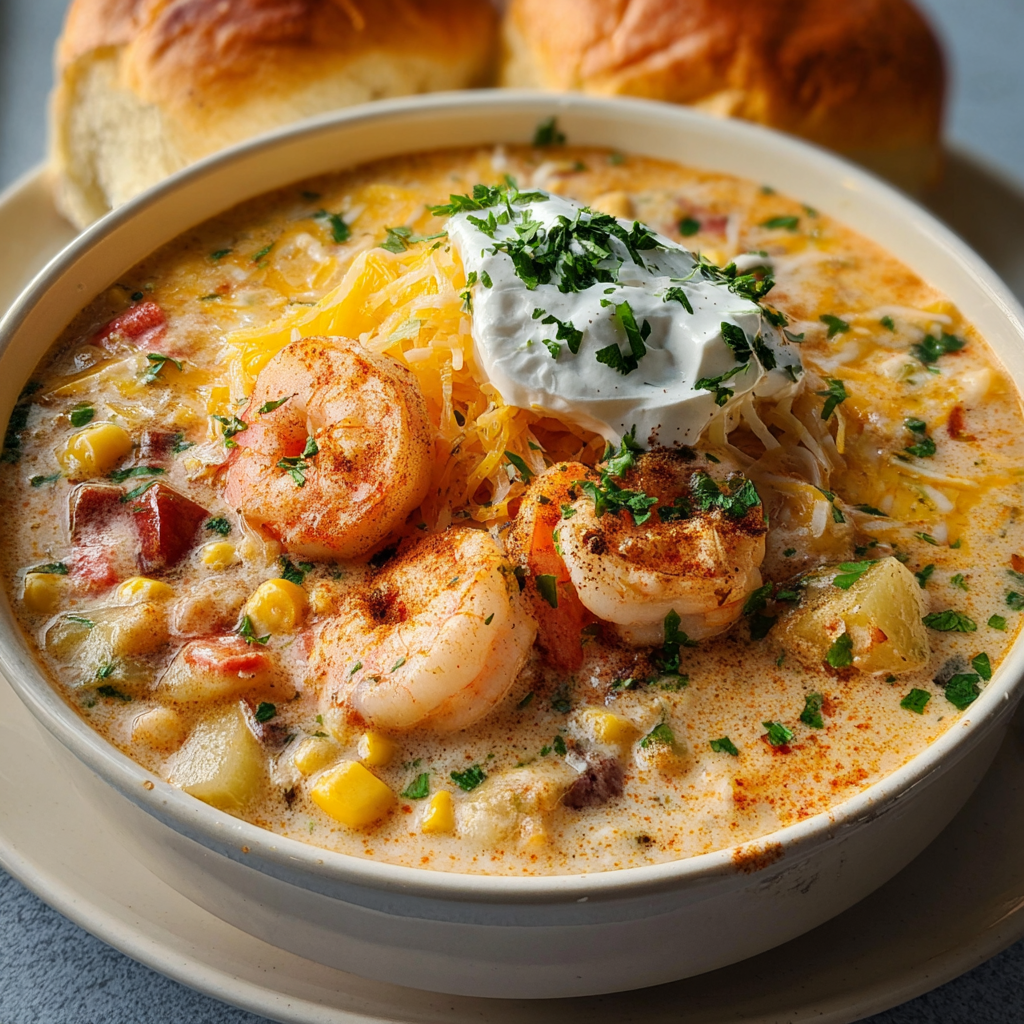
A comforting, creamy chili loaded with shrimp, lump crab, and lobster, balanced by beans, spicy tomatoes, and melty cheese for weeknight luxury.
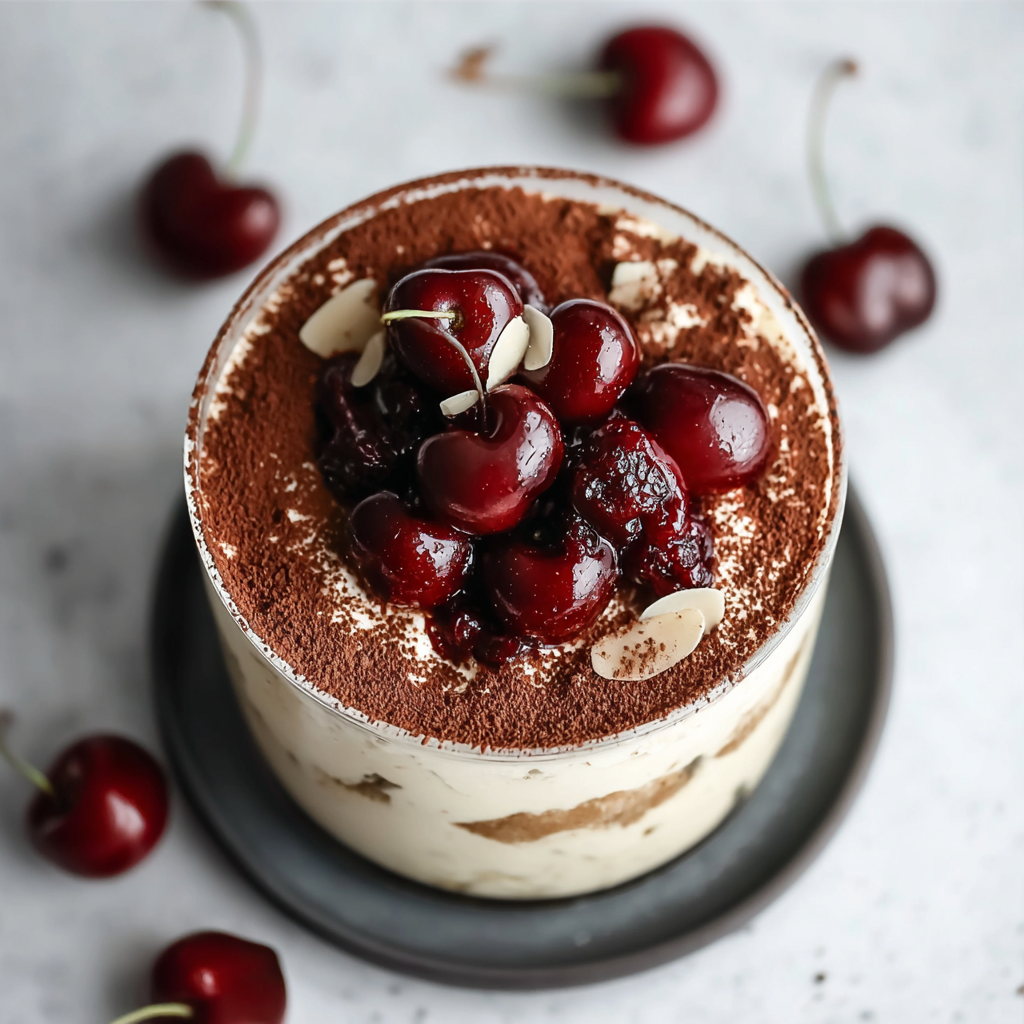
A luscious twist on the classic dessert combining mascarpone, fresh cherries and amaretto for a fragrant and elegant chilled treat.
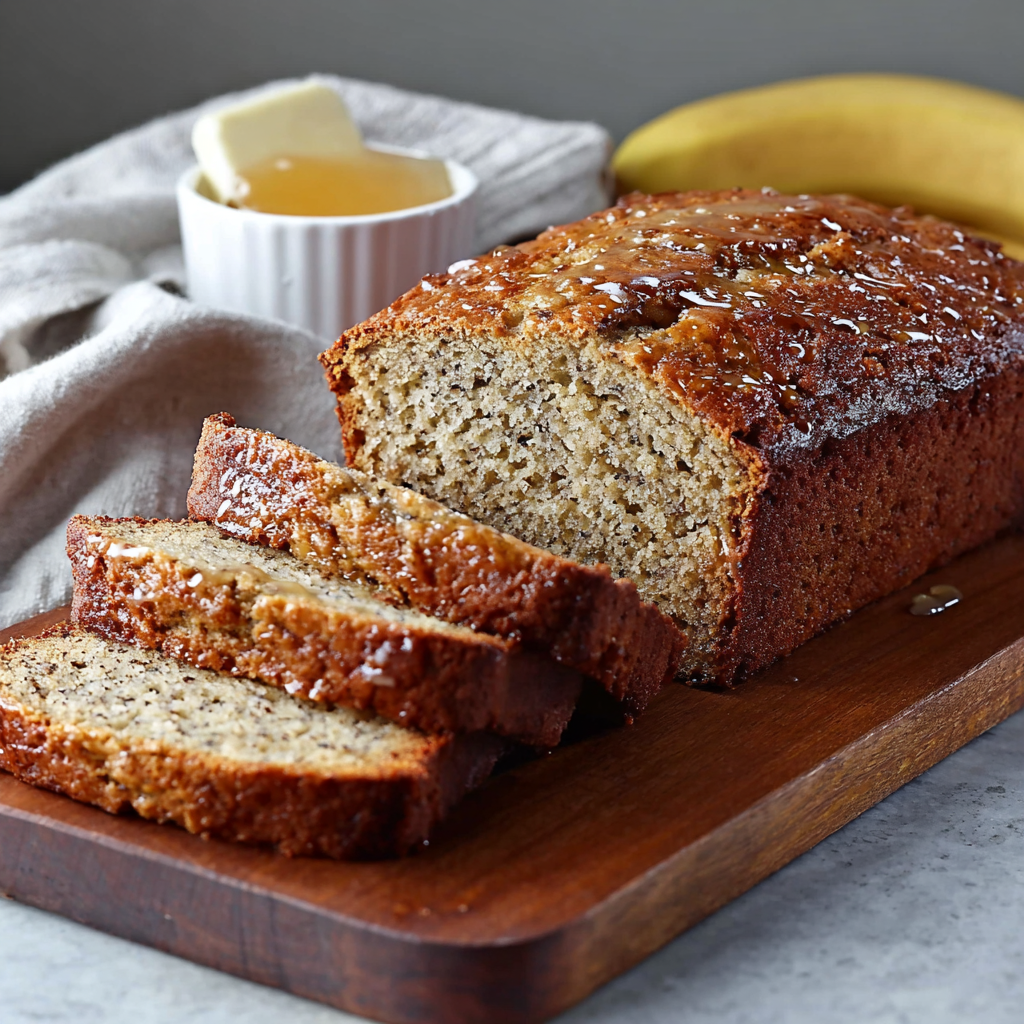
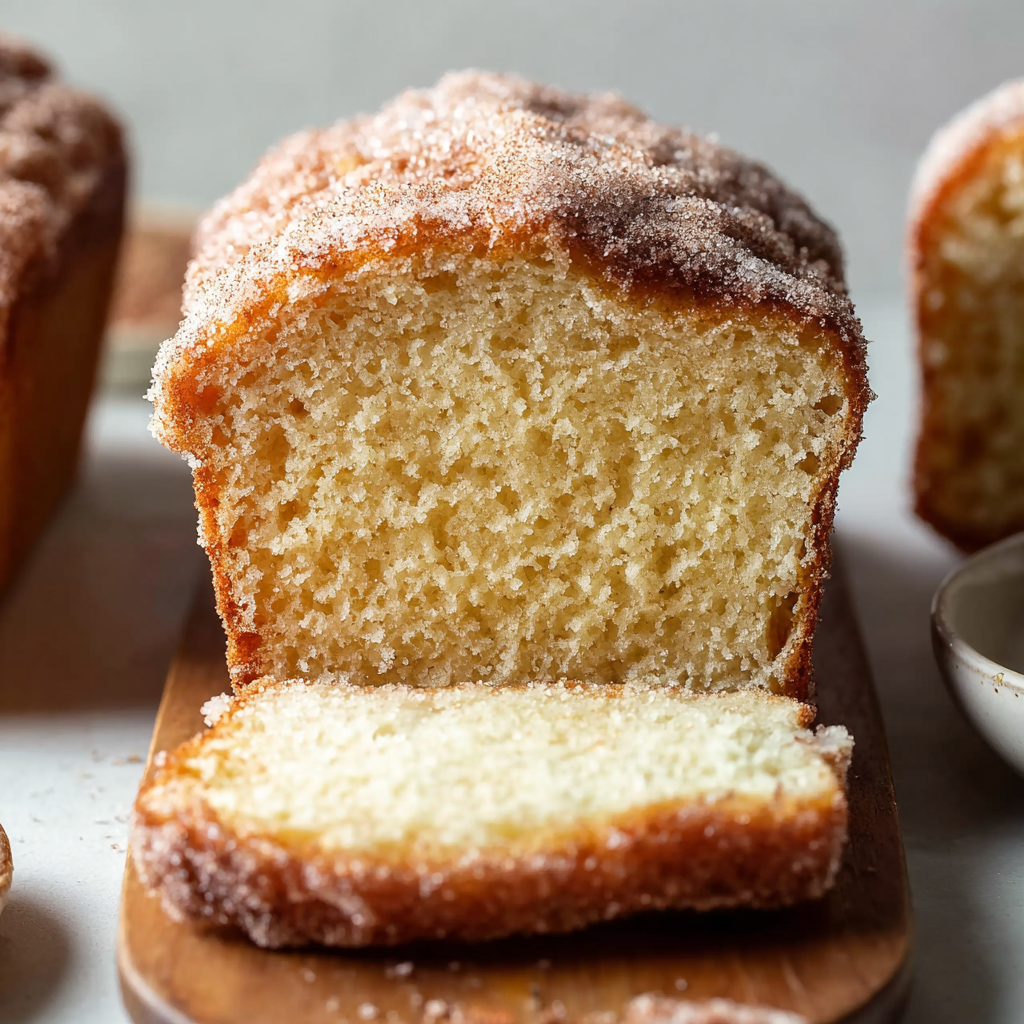
A tender, ultra-moist loaf made with ripe bananas, melted butter, and a simple mix-and-bake method—perfect for breakfast, snack, or dessert.
Leave a comment & rating below or tag @highrecipe on social media!
Enjoyed this recipe? Share it with friends and family, and don't forget to leave a review!
This recipe looks amazing! Can't wait to try it.
Comments are stored locally in your browser. Server comments are displayed alongside your local comments.

Join to receive our email series which contains a round-up of some of our quick and easy family favorite recipes.